Introduction
This article is intended to help users understand what features are available to publish content on the SFTARC web site. Only registered users who are logged in may publish articles/content to the SFTARC web site. All members are given basic level access rights which do not include publishing. If you wish to publish content to the webs site you may request updated rights from the web administrator.
Publishing rights options are:
- Author - Create an article and edit your own articles
- Editor - Edit all articles
- Publisher - Set article to "Published" state and setup article as "Featured"
If you have "Edit" rights for an article you will see the Edit Icon ![]() in the upper right of the article when you open it.
in the upper right of the article when you open it.
Content
The article "Content" tab displays a text editor that creates HTML formatted text. All content pasted into the text area must be entered as text only using the ![]() button in the second line of the editor. Do not change the "Font Family" unless there is a strong reason why, use the site defaults. Main body text is set to "Paragraph" in the top of the Tool bar. Other options are available in the drop down. Use the formatting options.
button in the second line of the editor. Do not change the "Font Family" unless there is a strong reason why, use the site defaults. Main body text is set to "Paragraph" in the top of the Tool bar. Other options are available in the drop down. Use the formatting options.
- An article "Alias" is created automatically from the Title. The article alias is what the what web site uses to retrieve content from the database. The alias must be unique.
- Use 5 space indents on all paragraphs.
The following must be set in the "Publishing" tab of the editor:
- Category must be set to define where the content will be displayed (details below). Site menu items will preset this option and it will not be editable.
- Access is default to "Public" leave it there unless you do not want the article available to the Public.
If you want to return to a previous version of your article you may click the "Versions" button at the bottom of the editor screen. Save as Copy does not work from the front end "Publishing" menu items.
Save frequently, the web site can time out and drop your unsaved edits.
Just get the basic information in the article...The editor will clean up format as needed ...
Images (Content Tab)
Images must be uploaded to the web site to be used in an article. You cannot copy an image to the article. The user should use the Image button ![]() at the top of the text editor to upload and insert their image.
at the top of the text editor to upload and insert their image.
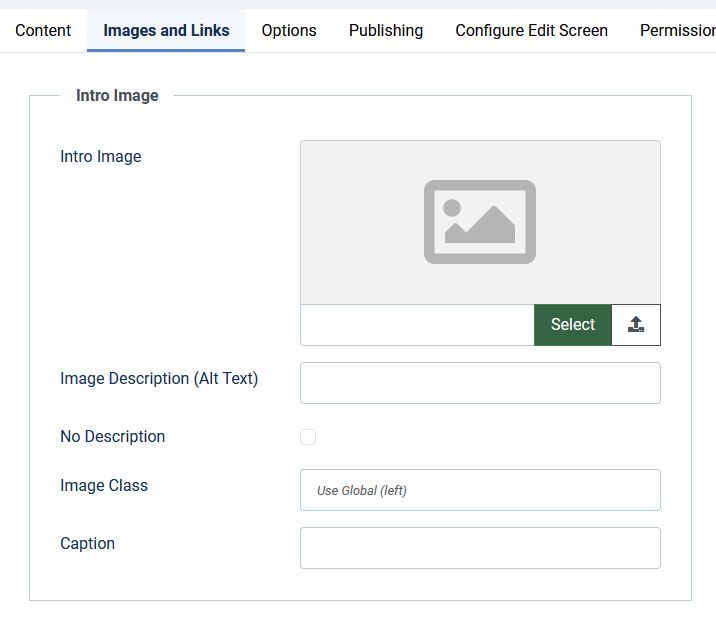
Note: Do not use the "Images and Links" tab to insert your article image. This tab is used for Tech Blog article "Intro Images" only.
- Click the Image Icon in the tool bar.
- Set the path where the image will be stored at the top left of the screen. Use the sub-folder in that matches your content type (i.e. /newsletter/).
- Click "Upload" in the Image Manager Extended" screen
- Open your PC file Explorer and drag and drop the file to the "Drop Files Here" area of the "Upload" screen and click "Upload"
- Click on the file you wish to insert into your article.
- Set Alignment, Clear, Margin and Border as needed.
- Select "Insert"
- Check out the Editor Help File for image formatting rules.
- Edit the image attributes clicking on the image
 Button in the editor menu bar if needed.
 - The "Captions"
 button will be available once an image is inserted.
 - Add a caption to you image by adding you text in the "Text" field, keep it short. If you want a long description of an image it can be added using other methods by an Editor. Formatting can be applied by to the text as needed.
Site Content Types
The following are the types of content that may be published on the web site:
Note: Add Calendar Event is not an article but is available to add to the club calendar.
Club Events and Newsletter articles use a similar process for creating the articles (General Rules for Publishing Articles).
A separate section below describes the additional attributes of a Tech Blog Article (Publishing A Tech Blog Article).
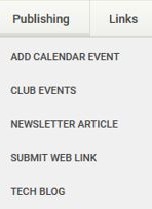
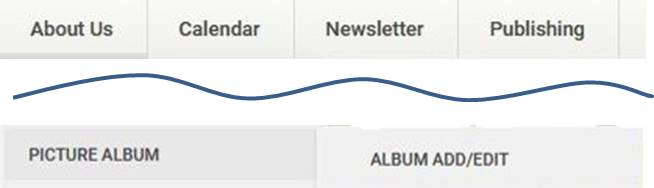
Also a user may post pictures to the web site Picture Album (found under About Us/Picture Album/Album Add/Edit). A separate help article describes Calendar Adds.
Note: Clicking on the "Publishing" menu will display a help screen.
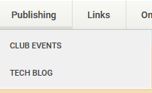
Public users or those not logged in will see a list of only two items:
These menu items list articles in these categories.
General Rules for Publishing Articles:
Use the "Publishing" menu selections to ensure your article is placed in the correct area of the web site. This will automatically set the correct "Category" for your content.
Make sure to set the following attributes in your article:
Authors
- Author Alias: Your Name - (Call Sign)
Publishers
- Status: set to "Published" (Only visible to users with "Publisher" privileges) Default is "Unpublished"
- Create Date: Click the calendar to set the current date. (Only visible to users with "Publisher" privileges) Default is "Today"
- Start Publishing: Select the date you want the article to appear (no date and its not displayed!)
- If you want your article to be "Featured" on the Home page send a request to the site web master
The following articles provide additional information to help you create and format your Event, Newsletter, Tech Blog Article or Web Link and in adding the specific content:
Select PREVIEW at the top right of the editor to preview your article. Don't forget to save it !
Do a final check of the article format by displaying it from one of the web site menus after you finish. Remember you will not break anything and the site admin will fix any errors and/or clean up the format as needed.
Publishing A Tech Blog Article (Trail Bytes)
Tech Blog article text and article images are entered the same as Event and Newsletter articles. The additional feature for a Blog is the ability to display an "Into Image" followed by a short piece of text from the beginning of your article. The length of the Intro text is controlled globally by the Blog configuration settings.

Inserting an Intro Image
- Select Images and Links to add the image.
- Click the "Select" button.
- A standard image screen will appear. Set the directory for the appropriate content type (i.e. Tech Blog)
- Click "Upload" and drag the image file from your file manger to the upload area. Leave the image size as is. The Blog formatting will auto size you image. Images that are not square may be cut off on the left and right edged.
- Set the "Alignment" (Not Set, Left, Centre, Right)
- Set "Clear" for "None" typically
- Do not use a border
- Click "Insert"
- You may format your Caption by highlighting it and selecting the attribute (i.e. Bold, font size)
Publishing a Web Link
The publishing of a web link is done by adding the URL of the subject site using the Publishing / Submit Web Link menu.
- Select a Category for where you want the link to be listed in the site links Menu.
- As with other content, depending on your user rights, an Admin may need to set the article to "Published" for it to be visible.
- The link may also be set by an admin to launch in a new window in your browser (The preferred setting).
Viewing Your Content
After you have entered an article it may be seen in the following menus (After it is set to "Published"):
- Events - Publishing/Events/List Events. Selecting the list will show all Published Events. If you are logged in the list will show all Published, Unpublished and Expired articles depending on your user privileges. View the article by clicking on the title.

- Newsletter Article - Publishing/Newsletter Article/News Input List. This list contains news articles pending publishing in the next newsletter. The display for the News Input List will be the same format as the Event List above. Articles will remain here until they are moved by the newsletter editor, after newsletter distribution, to appropriate categories for display. Content specific to the newsletter will be moved to the News Input Archive.
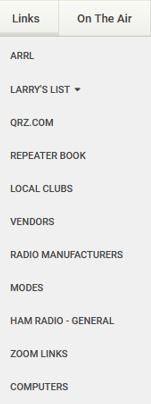
- Web Link - Links. The Links menu is broken down into several categories and sub categories to simplify the list. The category chosen when the Web Link is submitted will determine where it is displayed. Sub Categories will be displayed at the bottom of the list.
- Events are displayed either from Publishing/Club Events menu or in the About Us/Club Events menu.
- Tech Blog articles appear in the "Trail Bytes" area at the bottom of the home page or in Publishing/Tech Blog/List Tech Blog Articles.
If cannot find a particular article or subject use the Search menu to find it.